
Transform your home with simple DIY projects. You don’t need a big budget or a lot of time—these tasks can be completed over a weekend. They’re perfect for busy homeowners and renters alike. DIY home improvement projects can enhance your living space by adding both value and style without breaking the bank. From swapping out old light fixtures to creating a DIY gallery wall, the possibilities are endless with inspiration from Sumer Innovations.
These projects are not only cost-effective but also fun and rewarding. They allow you to express your personal style while making your space truly your own. Get ready to roll up your sleeves and start your DIY journey—your home will thank you for it!
1. Swap Out Old Light Fixtures
Swapping out old light fixtures can transform a room instantly. It’s a simple DIY home improvement project with big impact. Start by choosing modern fixtures that match your decor. Consider different styles like pendant lights or sleek, minimalist designs. Before you begin, ensure safety by turning off the power. Use proper tools like screwdrivers and wire cutters. Here’s a quick checklist for replacing light fixtures:
- Turn off electrical power.
- Remove the old fixture carefully.
- Connect new fixture wires to existing wires.
- Secure fixture in place.
- Test the new fixture for functionality.

Updating light fixtures not only modernizes a room but also improves lighting, creating a noticeable difference in ambiance. Choosing energy-efficient bulbs further enhances the benefits by offering longer life and reducing energy bills. Experimenting with different designs allows you to express your personal style, helping to create a cohesive and inviting space in any room. Whether you prefer classic or contemporary looks, there’s a fixture that suits your taste. Enhance your home lighting today!
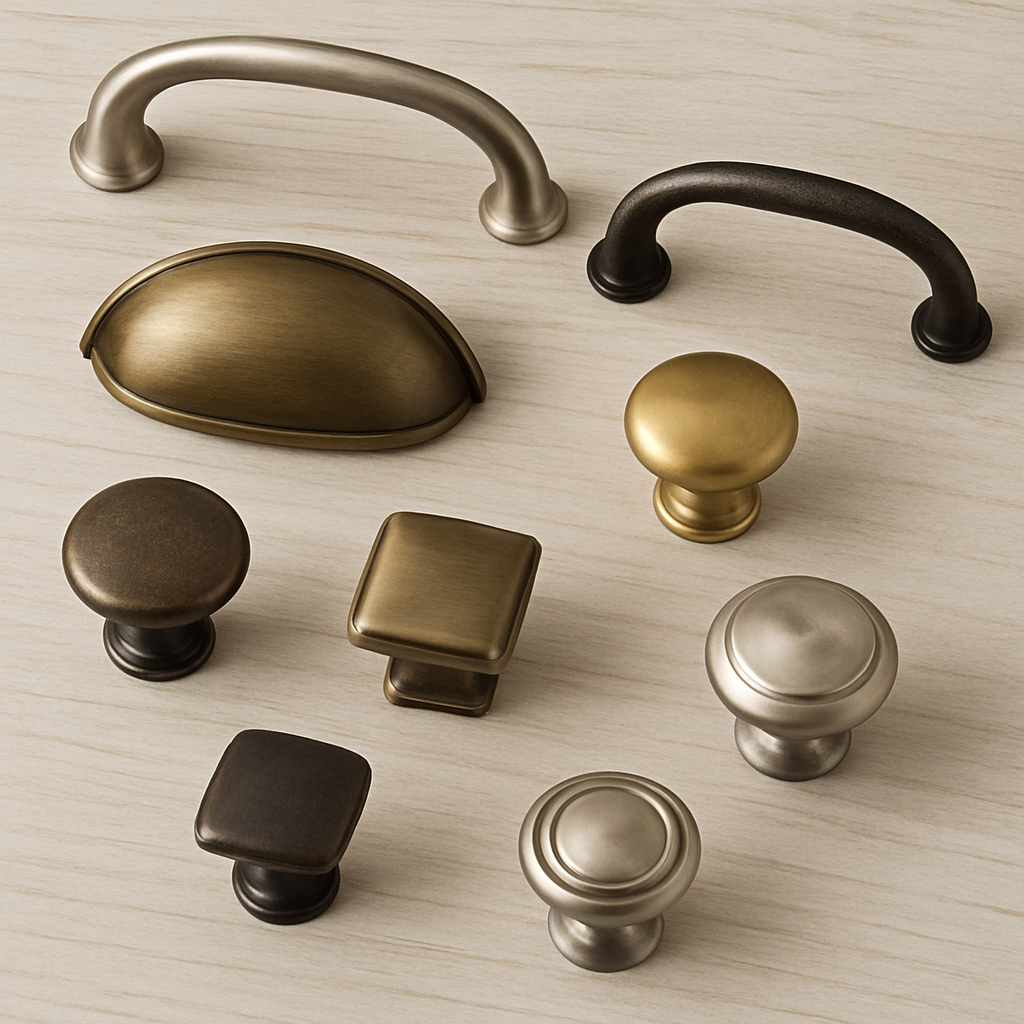
2. Upgrade Cabinet or Door Hardware
Upgrading cabinet or door hardware is an easy way to refresh your kitchen or bathroom. This project requires minimal tools and time. Old knobs and pulls can make spaces look dated. Swapping them out gives your space an instant facelift. Choose hardware that complements the room’s style. Options include stainless steel, brass, or matte black finishes. Consider the overall color scheme when making your selections. Steps to upgrade hardware:
- Remove old knobs and handles using a screwdriver.
- Measure hole spacing for new hardware.
- Mark new spots if needed and drill holes carefully.
- Attach new hardware ensuring secure fit.
- Check for smooth operation.
When selecting new hardware, prioritize functionality and aesthetic appeal. Hardware that matches door hinges ensures a cohesive look. Exploring unique shapes or materials adds character. For example, crystal knobs or leather pulls bring unique flair. Upgrading cabinet or door hardware is a cost-effective way to transform spaces. It’s one of the best DIY home improvement projects for an instant upgrade. Enjoy the transformation and boost your home’s appeal with this simple change!
3. Create a DIY Gallery Wall
A DIY gallery wall is a wonderful way to personalize your home. It showcases your style while displaying your favorite memories. To start, gather various frames, photos, and artwork. Mix different sizes and orientations for visual interest. You can add mirrors for extra depth. Before hanging, lay the frames on the floor. This helps you visualize the layout. Adjust until you’re satisfied with the design. Follow these steps to create your gallery wall:
- Select a theme or color palette for consistency.
- Use painter’s tape to mark the wall layout.
- Hang artwork starting from the center, working outward.
- Ensure frames are level for a polished look.
- Fill gaps with decorative elements like small shelves or plants.
 by Saung Digital (https://unsplash.com/@saungdigital)
Consider the wall’s existing decor when curating your pieces. The gallery should complement, not clash with, the room’s aesthetics. Experimenting with different textures and subjects adds character. Combine family photos with abstract art for a unique blend. A gallery wall is one of the best DIY home upgrades. It allows creativity to shine, making your space truly yours. Enjoy turning bare walls into a captivating display!
4. Install Peel-and-Stick Backsplash in the Kitchen
Transform your kitchen instantly with peel-and-stick backsplash tiles. This home improvement DIY project is budget-friendly and simple to execute. Peel-and-stick backsplashes come in various styles and materials. Whether you prefer a classic subway tile or a modern geometric pattern, options abound. They mimic the look of traditional tiles without the mess of grout and mortar.
The installation process requires minimal tools. All you need are a ruler, utility knife, and possibly a level. Clean the wall surface to ensure good adhesion. Follow the manufacturer’s instructions for best results. Key steps to follow:
- Measure your backsplash area accurately.
- Cut tiles to fit around outlets and corners.
- Press tiles firmly against the wall, smoothing any air bubbles.
- Align tiles carefully to maintain a consistent pattern.
- Trim any excess material for a clean edge.
 by Kyrie Isaac (https://unsplash.com/@keer_yay)
These tiles resist heat and moisture, which is perfect for kitchen settings. They are also removable, making this ideal for renters or temporary spaces. Besides practicality, peel-and-stick backsplashes bring aesthetic upgrades. They can brighten up a dreary kitchen and make cooking more enjoyable. Enjoy a refreshed cooking space that looks professionally done without the hefty price tag!
5. Paint an Accent Wall or Front Door
Add a splash of color to your home by painting an accent wall. This simple change can dramatically impact your home’s look and feel. Choosing the right color is key. Consider colors that complement your existing decor. Bold hues like navy blue or deep green can create a striking focal point. Softer shades like pastel pink or light gray add subtle sophistication.
Preparation is essential to ensure smooth application. Clean and prime the wall if necessary. Use painter’s tape to protect adjacent surfaces from accidental paint splashes. Steps to follow:
- Pick the perfect color and finish.
- Gather brushes, rollers, and paint trays.
- Cover floors and furniture to prevent paint drips.
- Apply the paint evenly, using long, smooth strokes.
- Allow paint to dry completely before applying a second coat if needed.
 by jonathan Valerius (https://unsplash.com/@jonathanvaleriusphotography)
Repainting your front door is another excellent option. It invites charm and curb appeal while being a manageable task for a weekend. A freshly painted door signals pride in your home and adds character to the exterior. Accent walls and doors let you express your personality. Go bold or keep it subtle. Either way, this best DIY home improvement project revitalizes your living space without extensive renovations.
6. Install Window Trim or Frame a Mirror
Adding window trim enhances your home’s architectural style and provides depth and definition to plain windows. It’s a subtle update that packs a punch. Begin by selecting the trim style. From sleek modern to classic colonial, there’s an option to match every taste. Materials range from budget-friendly MDF to luxurious hardwoods.
Measure the window precisely to ensure a perfect fit. Precision reduces waste and enhances the final look. The right tools, such as a miter saw, ensure clean cuts and seamless corners. In this project, paint or stain trim before installation. Doing so saves time and guarantees even coverage. Steps for installing window trim:
- Measure the window and cut trim to fit.
- Pre-paint or stain the trim, as preferred.
- Attach trim using a nail gun or adhesive for extra security.
- Fill nail holes and caulk edges for a polished look.
- Touch up paint if necessary.
 by Mon Jester (https://unsplash.com/@monjester)
Framing a mirror can also make a significant impact. It adds sophistication to bathrooms or hallways. Choose a frame style that complements your existing decor and attach it securely to the mirror. This weekend project is one of the smartest home improvement DIY projects available, offering elegance without massive investment.
7. Power Wash Your Exterior or Driveway
A power wash breathes new life into your home’s exterior and driveway. Dirt and grime accumulate over time, dulling surfaces and lowering curb appeal. Invest in or rent a power washer for this weekend project. It’s a valuable tool for maintaining outdoor spaces.
Before starting, assess which areas need attention. Siding, walkways, and driveways benefit most from deep cleaning. Powerful jets of water remove mold, mildew, and stains efficiently. Safety is crucial. Wear protective gear to guard against debris and water spray. Key steps for power washing:
- Choose the correct pressure setting for each surface.
- Sweep loose dirt away before washing.
- Test a small area to ensure the pressure won’t damage surfaces.
- Keep the nozzle moving to avoid streaks or damage.
- Rinse thoroughly to prevent residual soap marks.
 by thomas henke (https://unsplash.com/@weinraum)
This task doesn’t just beautify; it extends the life of your outdoor areas, making it a wise addition to your list of DIY home repairs. Enjoy the satisfaction of a job well done, as your home’s exterior shines like new.
Tips for Successful DIY Home Improvement Projects
To ensure success with your DIY home improvement projects, preparation is key. Begin by planning each step carefully and gathering all necessary materials.
Safety should always come first. Use proper gear and follow safety protocols to prevent accidents during your projects. Familiarize yourself with tools by reading instructions and watching tutorials. Break down tasks into manageable steps. This can make large projects less intimidating and easier to tackle. Prioritize areas that will provide the greatest impact for your home. Consider these essential tips:
- Set a realistic budget and adhere to it.
- Start with small projects to build confidence.
- Enlist family or friends to make projects enjoyable.
- Research thoroughly before starting any project.
- Adjust plans if unexpected challenges arise.
By following these tips, your home renovation ideas become achievable and rewarding. Embrace the learning process and enjoy the transformations you create.
Final Thoughts: Start Your DIY Home Upgrades This Weekend
Embarking on DIY home improvement projects offers a chance to inject new life into your living space. These projects provide personal satisfaction and noticeable enhancements around your home. With proper planning, you can transform your home over a single weekend. Remember, even small upgrades can make a big impact.
Each completed project brings its own rewards and inspires confidence. Start with one of these tasks and build momentum for future improvements. So, gather your tools, rally some support, and dive into a weekend of DIY fun. Create a home that reflects your style and meets your needs.
Sumer Innovations is here to guide you from simple DIY updates to more advanced renovations. Whether you’re starting small or dreaming big, our platform connects you with the right professionals to bring your ideas to life.
FAQs
What are some quick DIY projects I can do over a weekend?
You can swap out light fixtures, upgrade cabinet hardware, create a gallery wall, install a peel-and-stick backsplash, paint an accent wall or front door, add window trim or frame mirrors, and power wash your exterior or driveway.
Do I need prior experience for these DIY projects?
Most of these projects are beginner-friendly. Start with simple tasks like painting or replacing hardware, and follow safety instructions for more technical work.
How much do weekend DIY projects typically cost?
Costs vary by project, but most weekend projects are budget-friendly, often under a few hundred dollars, depending on materials and tools.
What tools do I need for these weekend projects?
Basic tools include screwdrivers, a drill, utility knife, measuring tape, paintbrushes/rollers, a level, and sometimes a power washer.

